Search Topic
How to set up Mixcraft DAW and start producing music effectively
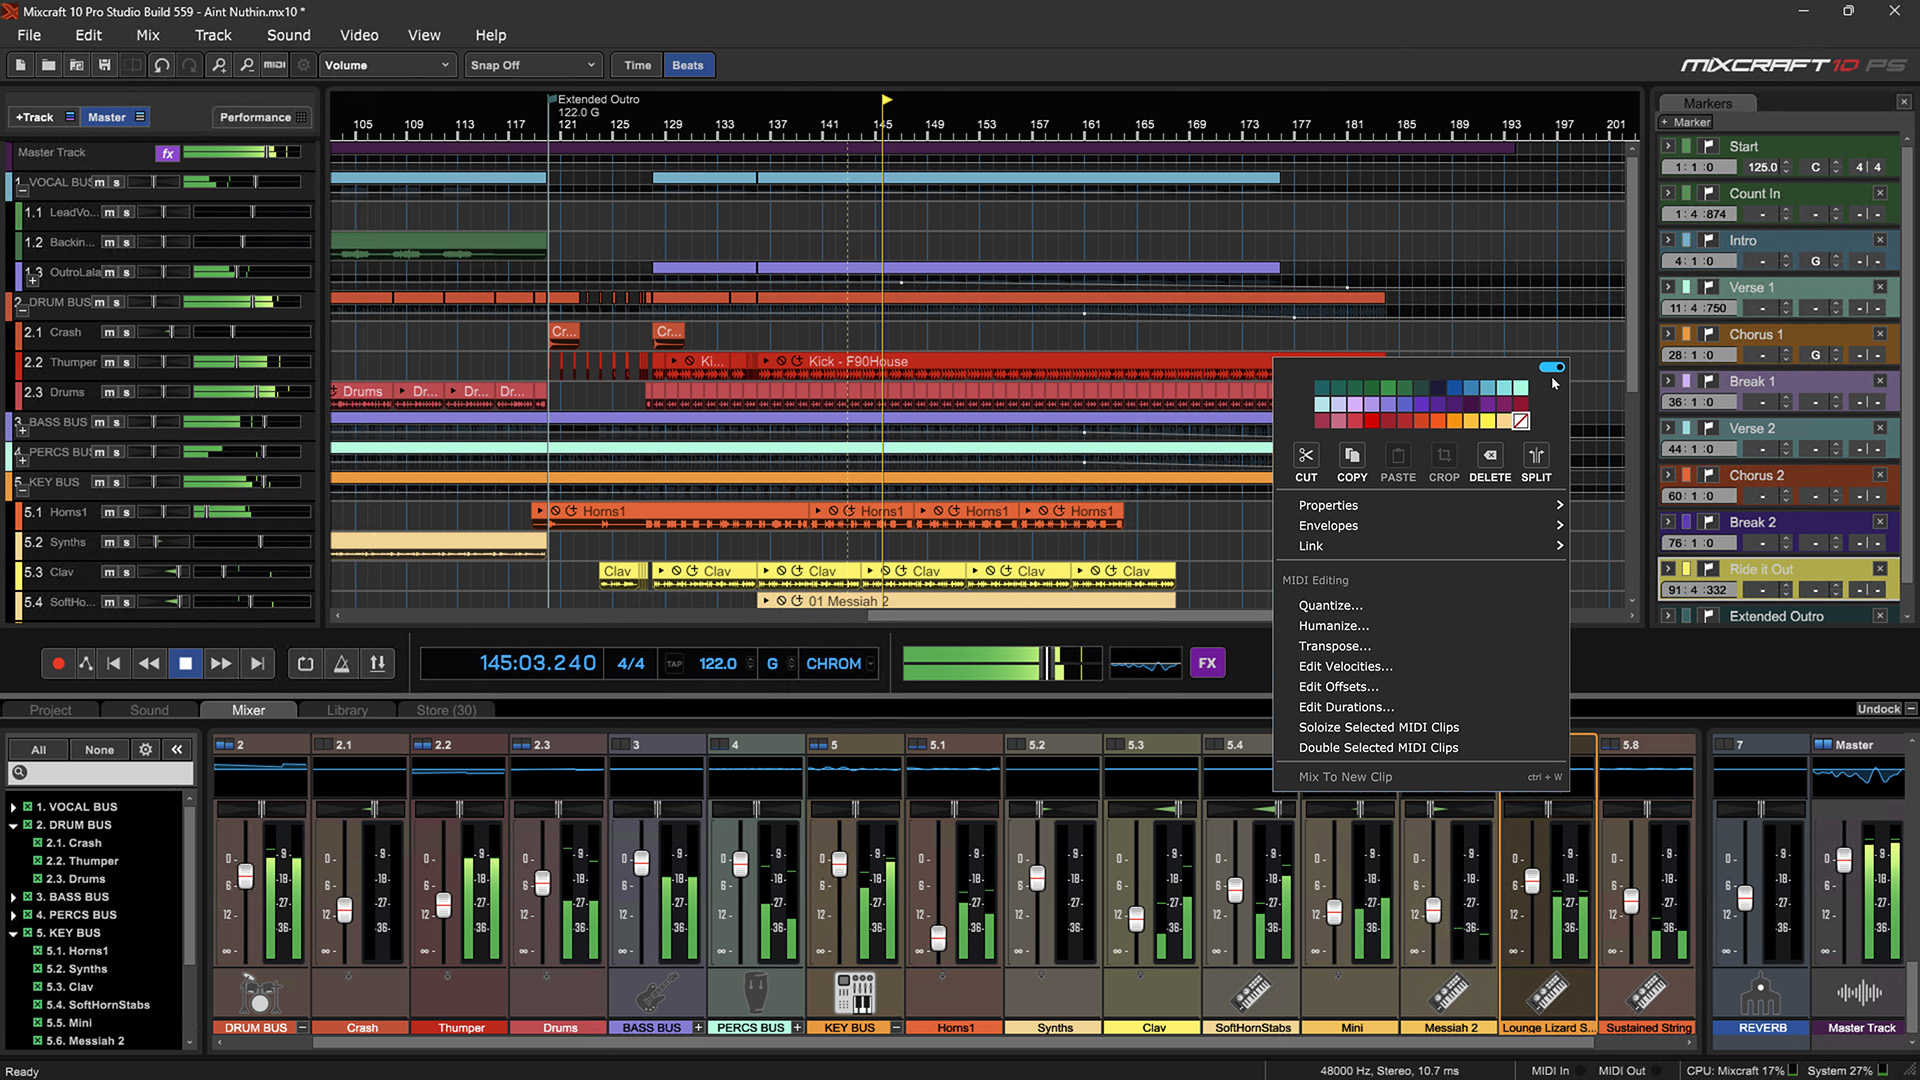
Mixcraft’s intuitive interface and powerful features make it an ideal DAW for both beginners and experienced producers. This guide will walk you through the setup process and provide actionable tips to enhance your workflow and unleash your creative potential. Millions of musicians worldwide use DAWs to produce music, and Mixcraft offers a compelling alternative to more expensive options.
Setting Up Your Mixcraft Environment: A Step-by-Step Guide
Installing Mixcraft and Choosing Your Audio Interface
Download and Installation: To get started, visit the official Mixcraft website. Choose the version compatible with your operating system—Windows or macOS. Follow the prompts to complete your installation.
Audio Interface Importance: A quality audio interface ensures optimal sound quality. For beginners, budget-friendly options like Focusrite Scarlett or PreSonus AudioBox offer great value.
Connecting Your Interface: Once you’ve set up your audio interface, connect it to your computer via USB. Open Mixcraft, and it should automatically recognize your device, but you might need to select it in the audio settings.
Configuring Your Audio Settings
Sample Rate and Bit Depth: For most projects, a sample rate of 44.1 kHz and a bit depth of 24 bits will suffice. Adjust this in the Mixcraft audio settings.
Input and Output Devices: Make sure your audio interface is selected as both the input and output device in Mixcraft settings.
Troubleshooting Audio Issues: If you encounter delays or poor sound, check your buffer size in audio settings. A lower buffer size reduces latency but may strain your CPU.
Organizing Your Workspace for Efficiency
Folder Structure: Create dedicated folders for different projects, samples, and assets. This keeps everything accessible and organized.
Customizing the Interface: Adjust the layout of Mixcraft to fit your workflow. Hide or show panels like the mixer and transport controls as needed.
Keyboard Shortcuts: Familiarize yourself with Mixcraft’s keyboard shortcuts to speed up your workflow. For example, “Ctrl + Z” for undo and “Spacebar” for play/pause.
Understanding the Mixcraft Interface: Key Features Explained
Navigating the Mixer
Channel Strips and Faders: Each track in Mixcraft features a channel strip with controls for volume, panning, and effects sends.
Sound Balancing: Use the mixer to balance sounds across different tracks. Ensure every instrument complements each other.
Using EQ and Compression: Apply EQ to remove unwanted frequencies and use compression to control dynamics. For instance, cutting low frequencies on a vocal track helps it sit better in the mix.
Mastering the Arrangement View
Adding Tracks: Click the “+” icon to add new tracks. You can choose from audio, MIDI, or instrument tracks.
MIDI Editing Tools: Right-click on any MIDI track to open the piano roll and edit notes. This tool allows precise adjustments to melodies and rhythms.
Employing Automation: Create dynamic changes by automating effects and volumes. Right-click on a track and select “Add Automation” to get started.
Utilizing Mixcraft’s Built-in Effects
Library Exploration: Mixcraft offers numerous built-in effects, including EQ, Reverb, and Delay. Explore these to find sounds that fit your style.
Enhancing Sonic Character: Adjust parameters on effects to enhance the character of different tracks. For example, adding reverb gives a sense of space.
Creating Unique Sounds: Experiment with effects to replicate specific sounds. For instance, use the tape delay plugin to achieve a vintage sound.
Recording and Editing Your Music in Mixcraft
Recording Audio Tracks
Setting Input Levels: Ensure your input levels aren’t too high to avoid clipping. Aim for levels that peak around -6 dB.
Vocal Recording Techniques: Use a quality microphone and pay attention to room acoustics. A quiet room with minimal reflections ensures a cleaner recording.
Troubleshooting Recording Issues: Address issues like background noise or latency. Use noise gates to minimize noise and adjust your buffer size for better performance.
Editing Audio Tracks
Editing Tools: Mixcraft provides powerful editing tools. Use cut, trim, and splice to refine your audio tracks.
Applying Fades: Use fades and crossfades to create smooth transitions, particularly at the beginning and end of audio clips.
Time-Stretching and Pitch-Shifting: Need to adjust tempo or pitch? Use these tools to manipulate your audio without quality loss.
Quantizing and Editing MIDI
Quantizing Notes: This feature fixes timing issues in MIDI tracks. Select the notes, right-click, and choose “Quantize.”
Refining Melodies: Edit MIDI notes in the piano roll for accuracy. Adjust notes to create harmonies or change rhythms.
Using MIDI Controllers: Connect a MIDI keyboard for real-time recording. Controlling parameters while performing adds a personal touch.
Mixing and Mastering Your Tracks in Mixcraft
Mixing Techniques for a Balanced Sound
Professional Mixing Strategies: Aim for a balanced mix by adjusting levels and panning. Use reference tracks to compare your sound.
Importance of Gain Staging: Keep levels in check throughout your mix. This helps prevent distortion and ensures clarity.
Shaping Individual Tracks: Use EQ and compression judiciously on individual tracks, making sure each element sits well in the overall mix.
Mastering Your Tracks for Distribution
Preparing for Online Distribution: Ensure your tracks meet the loudness and quality standards for platforms like Spotify and Apple Music.
Basics of Mastering: Mastering is about finalizing your mix. Use tools like limiters and multiband compressors to polish your sound.
Professional Mastering: Consider sending your track to a professional mastering engineer for the best results if needed.
Exporting Your Finished Track
Choosing File Format and Bitrate: Export in WAV for high quality and MP3 for smaller file sizes. Typically, 320 kbps is good for streaming.
Optimizing Audio Files: Check your export settings to ensure the best sound quality.
Common Export Issues: If your track doesn’t export correctly, check for muted tracks or misconfigured settings.
Conclusion: Your Journey to Music Production Success
This guide provided a detailed walkthrough of setting up Mixcraft and using its features to produce your music. Remember to practice consistently and experiment with different techniques to refine your skills. With Mixcraft’s versatility and your dedication, you can create compelling music and share it with the world.


